In recent years, Redis has become a common occurrence in a Node.js utility stack.
In this tutorial, we are going to give you a quick introduction to Redis.
What is Redis?

Redis supports disk-persistent data storage, too, if needed.
It’s free, every week, in your inbox.
Supported data structures give Redis the versatility for many use cases.

Redis use cases
One of the most popular use cases of Redis is caching.
It is especially the case for expensive (in time) operations.
As a back-end developer, our task is to complete the clients requests as fast as possible.
We would then periodically update the cache so that users can see updated information.
It makes Redis the perfect choice for caching.
Its key-value data storage is another plus because it makes data storage and retrieval much simpler.

In this tutorial, we are going to see how to do caching with Redis and Node.js.
Redis for real-time analytics
Redis promises sub-millisecond long data processing operations.
It makes Redis a perfect candidate for applications that rely on real-time data analysis.
Redis even provides an AI-supported faster transaction scoring system and faster statistical models to perform this use case better.
Other use cases in real-time analytics include real-time inventory management systems and gaming leaderboards.
Redis as a Queue
you could use Redis to queue tool tasks that take a long time to complete.

The process of caching with Redis is quite simple.
If yes, we can quickly retrieve data from Redis and send the response.
Now that you have a clear idea of what we are going to do lets start the implementation.

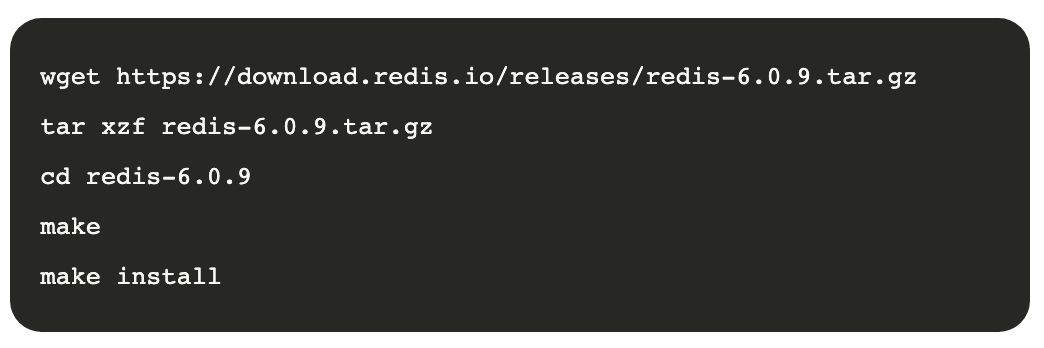
Install Redis
If you havent already, you should probably install Redis for this tutorial.
it’s possible for you to download the binaries and compile them easily using the following commands.
To ensure that the Redis server runs without an issue, send a ping to the server using theredis-cli.
If you receivepongas a response, the Redis server is running successfully.
Read theofficial quick start guideto get a better idea if something goes wrong.
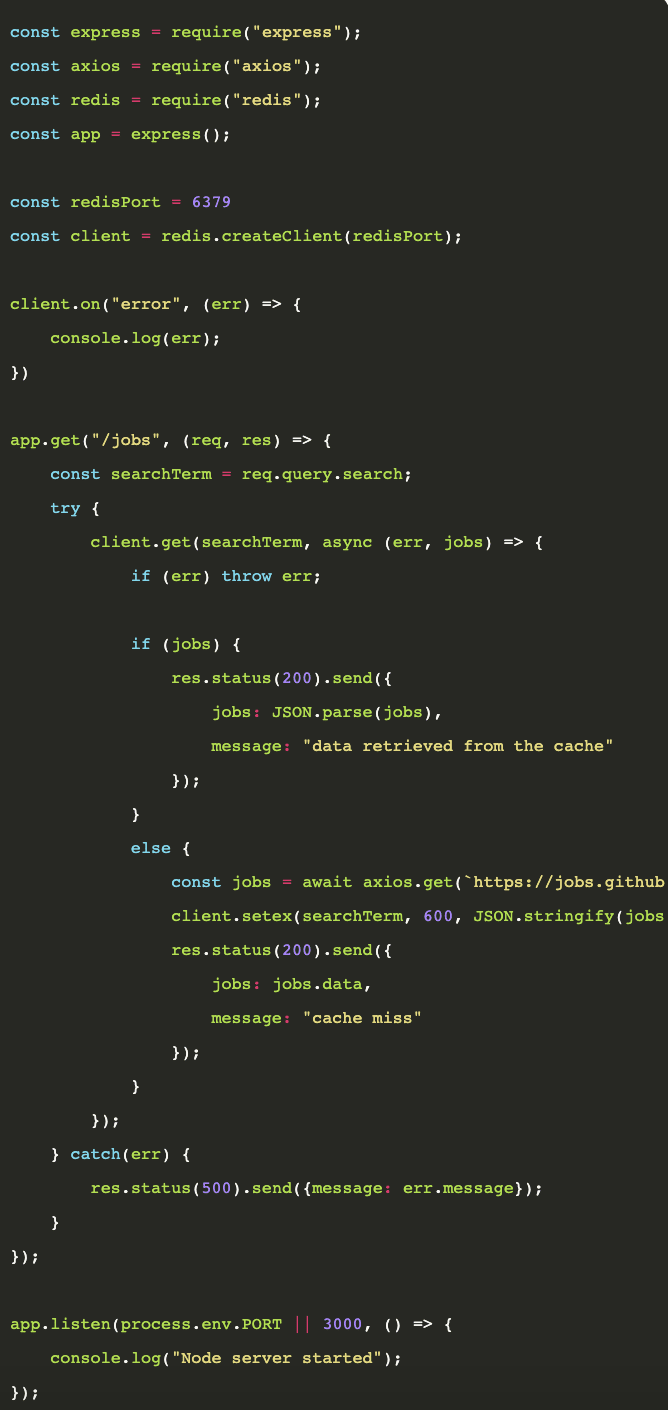
Build the NodeJS utility
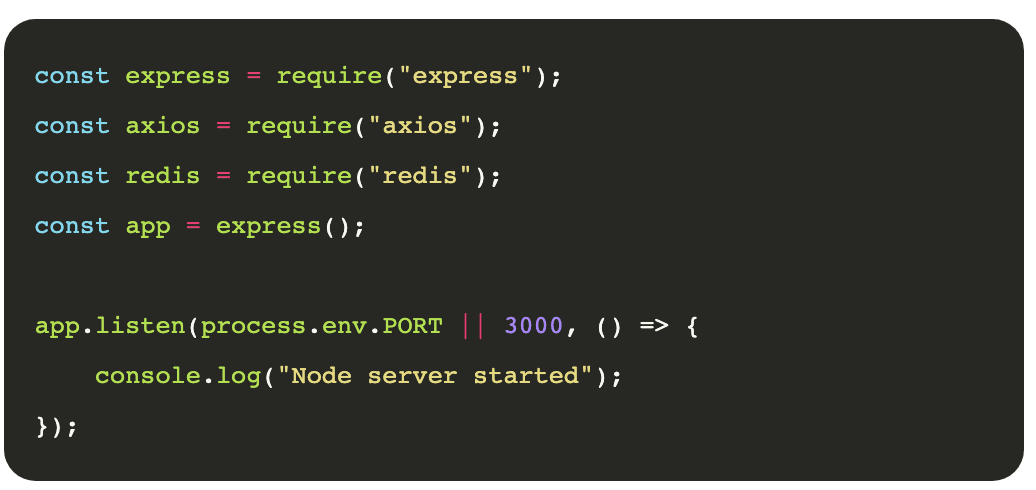
Basic set-up
Set up the initial boilerplate for the Node utility like this.

Note how we use two additional packages namedaxiosandredis.redisis the standard Redis client for Node.
We useaxiosto retrieve data from an external API for this tutorial.
Before continuing, verify to install those two packages using npm.

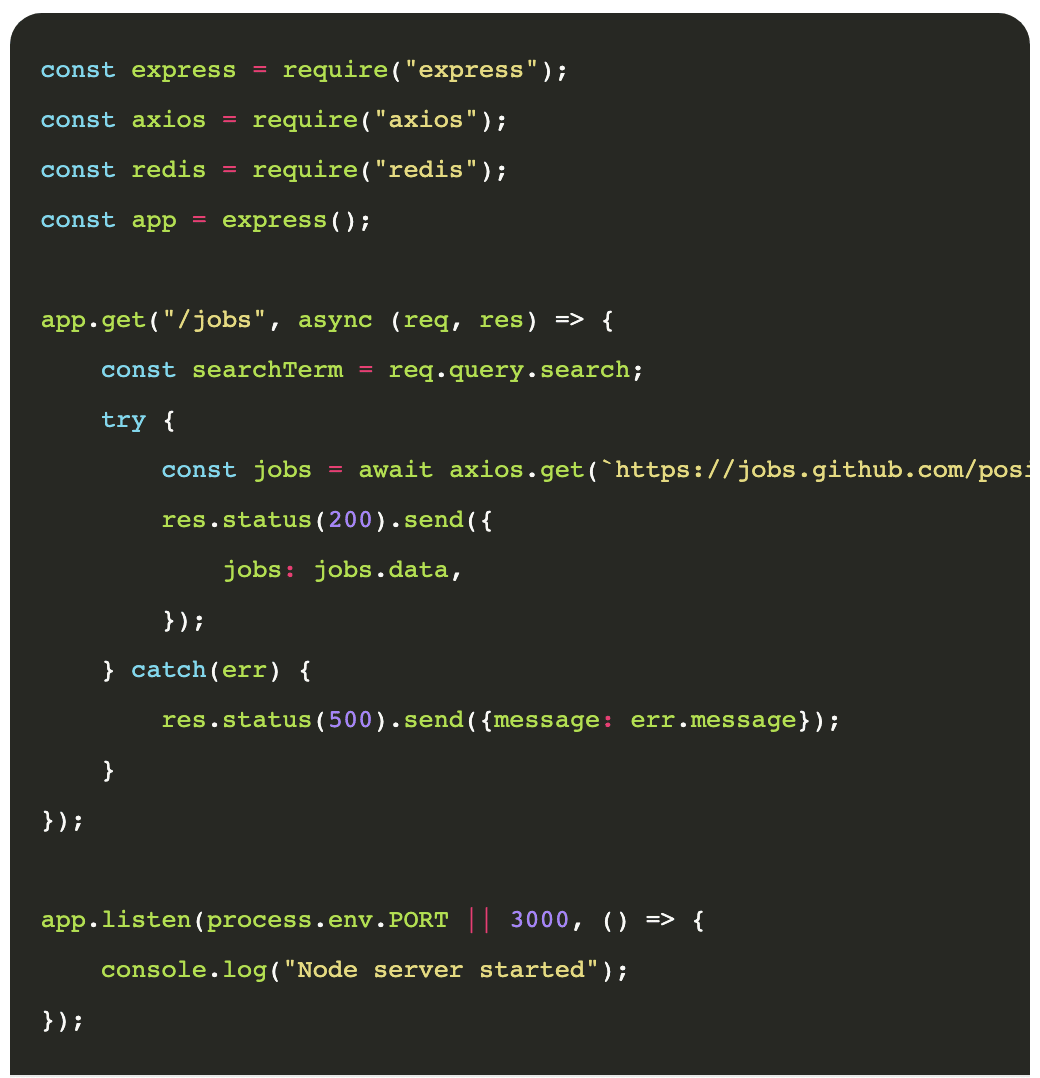
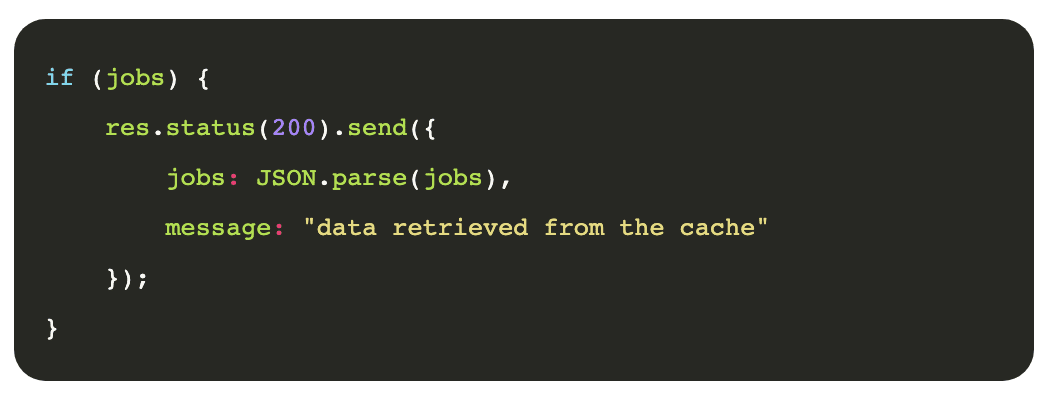
A sample request to the API looks like this.
Here, we useaxiosto send a GET request to the GitHub Jobs API with the user-provided search term.
Lets see how the route works now using Postman.
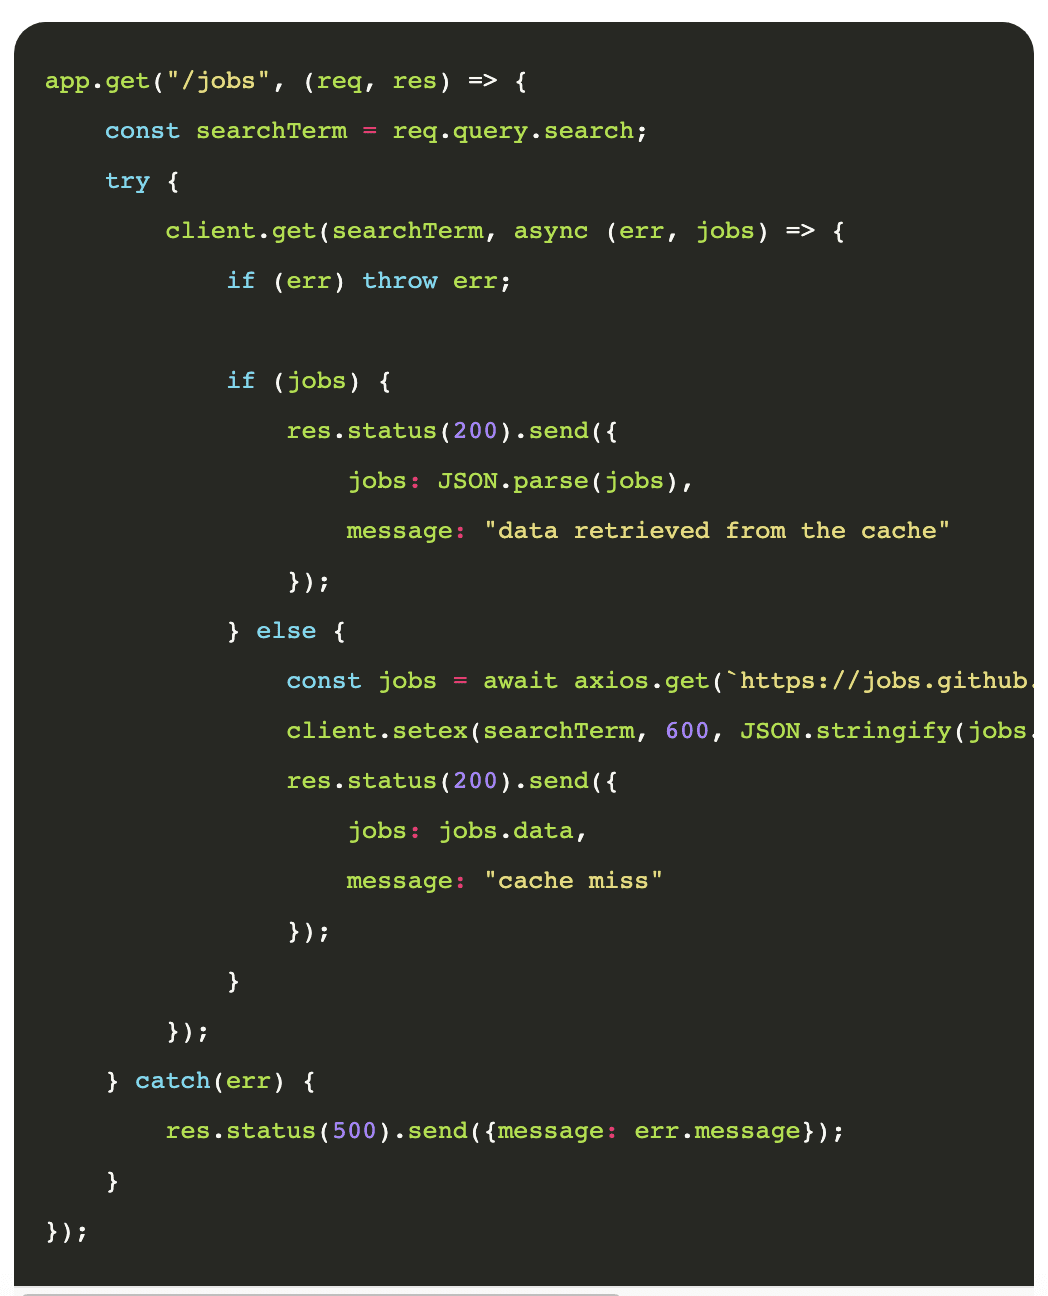
First, we need to connect to the Redis server through our software.
We use the installed redis package for this task.
Redis server listens on port 6379 on default.

So, we pass the port number to connect to Redis and create a client.
Then, implement the logic to store and retrieve data from the cache.
Whats going on here?
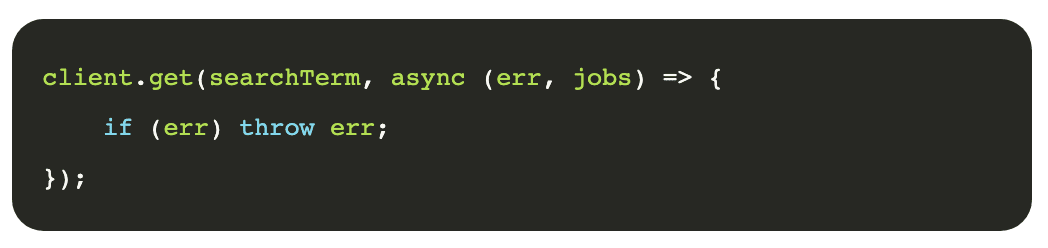
Just ensure you cast back the string to JSON.
Note how we use thesetexfunction to store data in the cache.
Full source code
Thats it.
We have created a simple cache for our tool.
That wasnt so hard, was it?
I used Postman to send requests to the server and measure request completion time.
Sign up for updates on everything related to programming, AI, and computer science in general.
Also tagged with